Canvas Apps and the power platform are amazing at accelerating the development of business applications, often cutting the length of a typical traditional dev stream by up to 70%. They open up application development to the business users (aka the “citizen developers”) in your organization, and allow them to implement advanced functionality with very little software development knowledge required.
However, despite Microsoft’s success in democratizing business application development, it is still very important to implement some core best practices when building applications.
Here are my 8 rules to improve your canvas apps:
1. Work to canvas app’s strengths
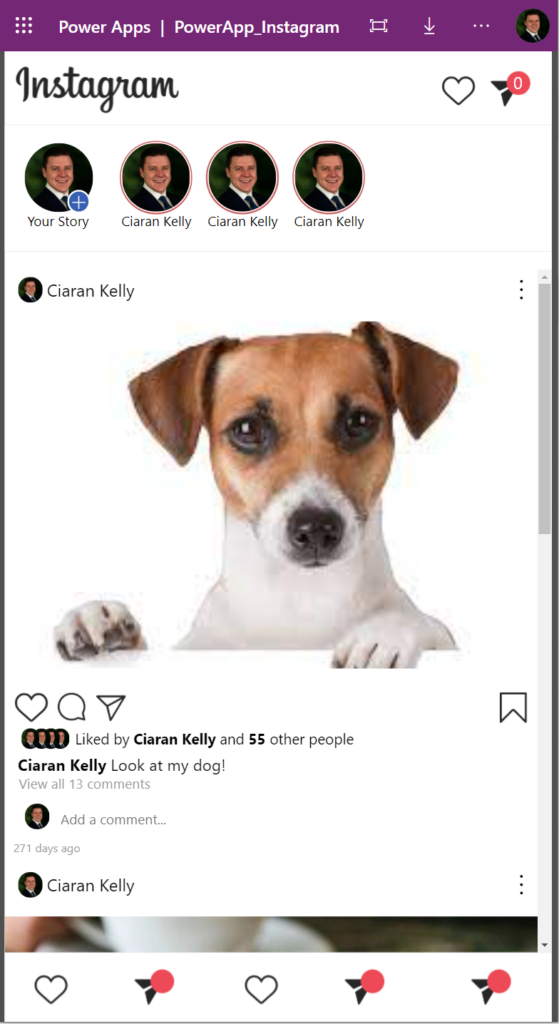
Canvas Apps allow you to build beautiful user interfaces using a WYSIWYG or a “What You See Is What You Get” designer. It is super quick and easy to replicate most application UI’s you see out there today using this designer by dragging and dropping components onto the screen and modifying their style properties.
Example pictured:
However it is very important to remember that it is recommended to use a maximum of 500 controls per Canvas App. Reason being, when a Canvas App renders, it has to generate a large amount of HTML code per control, and then serve that to the end-user over the network which can create performance issues and long wait times, ruining a user’s experience in your application.
For small applications, this limitation shouldn’t be a worry, however for larger applications – you will need to worry about rationing out what controls you really need. One culprit I often see, chewing up my component quota are icons on buttons. They can really add a layer of polish to a user interface but at huge a cost.
For a single button, adding an icon could turn one control, into three. eg:
- The Icon Control
- The Button Control
- The overlay Control (To alleviate any click detection issues)
This can obviously be expensive in larger applications, if repeated again and again, and in my opinion the cost to performance and complexity isn’t worth the extra detail to the user interface.
2. When you send a request to the server, always check for errors
Because Canvas apps are built using PowerFX, Microsoft’s “Excel-like” low-code language, it can be very easy to forget to check for errors on dependent sections of your application’s code when working with data sources.
If errors do occur, and your application doesn’t know how to handle them, your application could potentially mess up entirely, greatly disrupting your end-users, and their confidence in the app itself. (not ideal!) Luckily for us app makers, Microsoft have made error handling extremely easy in Canvas Apps for us to implement, with the IfError, IsError and IsBlankOrError formulae.
You can find example usages of these formulae at: IfError, IsError, and IsBlankOrError functions in Power Apps – Power Apps | Microsoft Docs
3. Establish and follow a component naming convention
To make your application easier to debug, and handover to other developers, it is highly recommended to establish and stick to a naming convention when creating components. This naming convention should be concise, it should describe what the component does, and it should describe what type of component it is.
The reason being, when you are building larger applications, the intellisense will show all controls within your application, and this can get very confusing, very quickly when building new functionality. I usually give my controls a prefix, summarizing what the control is, and then a concise name summarizing what the control is for.
Here are a few examples:
- If I have a screen that is going to be used for contact information capturing, I would name it: Scn_CaptureContactInfo
- If I have a text input that was capturing someone’s name, I would name it: Inpt_PersonName
- If I had a button that saved data to the database, I would name it: Btn_SaveDataToCloud
4. Really think about the scope and use of your variables
A variable is a way to tell your Canvas App to remember a piece of data. It can be useful for larger applications, where you may want to store and refer to the outcome of a computation, or store a server response, so you don’t have to send multiple requests to retrieve the same information again and again. Although there are different types of variables available to us within Canvas Apps; these include:
| Formula | What is this used for? |
| Set(VariableName, VariableValue) | This creates a global variable. |
| UpdateContext({ VariableName : VariableValue}) | This creates a local variable. |
| Collect(VariableName, VariableValue) | This creates a global variable that contains one or more records as a table. |
It is important to know when to use these different types of variables in your application. Unnecessarily storing too much data in the application can make it extremely slow for the end user, this is why we don’t always use global variables when developing.
A local variable, is a variable that is “scoped” to the single screen that it was initialized on, meaning that you can’t access the variable from other screens. The local variable will hold it’s value until the application is closed, or the value is manually removed. These can be useful if you would like to store data that is only required on one screen in your application.
A global variable, is a variable that can be accessed from everywhere within your application. It can be very useful if you need to refer to, or update data that originates from another screen. This variable type will also hold it’s value until the application is closed, or has it’s value removed manually.
A collection is a way to store multiple records of the same type of data in one variable. However, what makes collections special, is that they allow us to update specific records in the collection instead of the whole data-set if required. (I will go further into the use of collections in another blog post)
To clear these variables of their values is very easy to do. For global and local variables we can simply reuse the same formulae we used to create them, but instead setting the value to Blank(). Although for a collection, we can use the Clear() formula.
Example:
//Local Variable
UpdateContext({ MyLocalVariable : 12 });                  //Setting value
UpdateContext({ MyLocalVariable : Blank() });             //Clearing Value

//Global Variable
Set(MyGlobalVariable, 12);                                //Setting value
Set(MyGlobalVariable, Blank());                           //Clearing Value

//Collection
Collect(MyCollection, { RecordName : "Sample Name" } );   //Setting Collection
Clear(MyCollection);                                      //Clearing Collection
5. Avoid cross screen dependencies at all costs
A cross screen dependency is when you access a control from another screen in your PowerFX code. A common scenario where this is seen is when a user inputs data into a form on one screen, and then that same data is accessed on another screen. (be it a confirmation screen, or a multi-step complex form user journey)
Cross screen dependencies won’t break your application, however they will force Canvas Apps to load all dependent screens and components at once causing your application to severely decrease in performance. To avoid cross screen dependencies, it is highly recommended to store the required data into a global variable, which can then be accessed anywhere within the application.
Using global variables instead of cross-screen dependencies will also make your application easier for other developers to debug.
6. Do not run expensive processes on a screen’s “On Visible” property
The “On Visible” property of a screen does exactly what it says on the tin. It triggers PowerFX code when it’s screen becomes visible. As a Canvas App developer, it can be very tempting to retrieve the data that the screen requires on this property, however this can be a bad design choice.
It can slow down the loading of the screen drastically, if the PowerFX code ran here is “expensive”, resource intensive, or relies on a network connection. Also, I have noticed in the past that, if you reference controls on the same screen as your “On Visible” PowerFX code, the code can run prior to the control’s loading and/or initializing causing hard to troubleshoot bugs to occur.
Instead I recommend moving these expensive processes from the “On Visible” property of the screen, to the “On Select” property of an invisible button on the same screen. This allows the code to run after the loading of the screen, and also allows the code to be reusable / re-triggerable later on, using the Select(ButtonContainingCode); formula.
7. Delegation and Data Row Limits
This is the most important point of in the post. If not understood, non-delegable formulas and data row limits can break your application entirely.
A delegable formula can run server-side, with the data source you are using, whereas a non-delegable formula will run client-side in your application. This becomes important with larger data sets that breach your data row limits. By default, the data row limit in Canvas Apps is set to 500 records, but this can be changed to a maximum of 2,000. The data row limit defines how many records you can retrieve from a data source in a single request, so if you have your data row limit set to 2,000, and you are running a non delegable formula on a data source with 3,000 records, you will get an unreliable result, as the formula would have on ran on only 2,000 records, not the entire data-set in this instance.
This can be alleviated by:
1. Using delegable formulae. This is the simplest way to avoid these limitations, and the formulas that are delegable can differ when using different data sources. You can find typical delegable formulae documented here.
2. Retrieving the records you are going to run the formula on in batches. If your records are sequentially numbered, you can request the first 2,000 records, and then the remaining 1,000 records in the scenario described above, by adding criteria to the data retrieval request. (However it is important to note, this method can quickly chew up your request limit on extremely large tables)
3. Filtering the records that you are running the formula on. More often than not, you don’t actually need to run the formula on the entire table, instead you can filter the table to show only the appropriate records, and if the number of appropriate records is below your data row limit, you can then run the formula on the data-set with no issue.
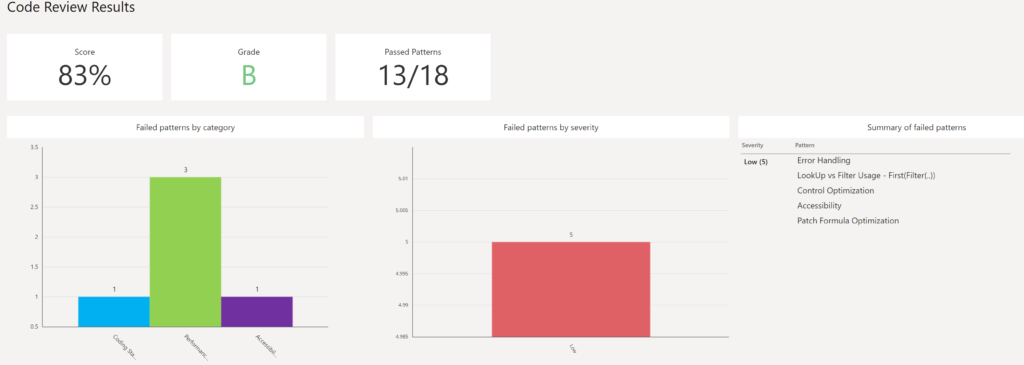
8. Formalize your canvas app code reviews
If your organization is serious about producing high quality and reliable Canvas Apps, it is super important to formalize a process to review the changes that go into your application. Canvas Apps can now be extracted into code to track with source control using the snazzy PowerApps CLI (Microsoft Power Platform CLI – Power Apps | Microsoft Docs).
Once in source control, we can run a standard peer review process, we would perform in a traditional development.
Another great tool available to us as Canvas App developers, is the Power Apps code review tool. Courtesy of Microsoft’s Power CAT team, it scans our work, and grades the quality of the application based off best practices, and known problematic coding patterns.
The tool can be downloaded at: powerapps-tools/Tools/Apps/Microsoft.PowerApps.CodeReview at master · microsoft/powerapps-tools · GitHub